-
×
 Irrigation : BASE KIT
1 × $49.95
Irrigation : BASE KIT
1 × $49.95
Subtotal: $49.95
Irrigation : BASE KIT
1 × $49.95 Subtotal: $49.95
$69.95
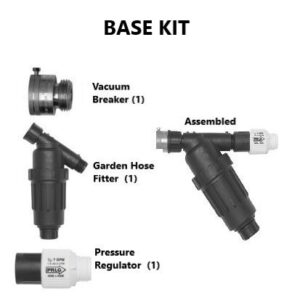
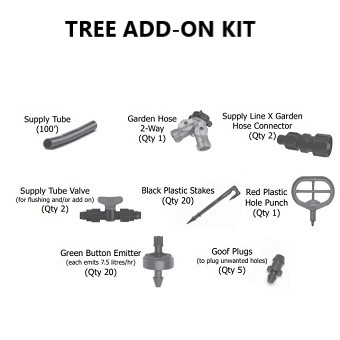
With this kit you can run an irrigation line along a row of trees or shrubs. Contains 100' of Blank Orchard tubing and the necessary fittings. Also includes a hole punch and 20 button emitters allowing you to tailor your layout to any tree spacing. Layout and assembly instructions included.
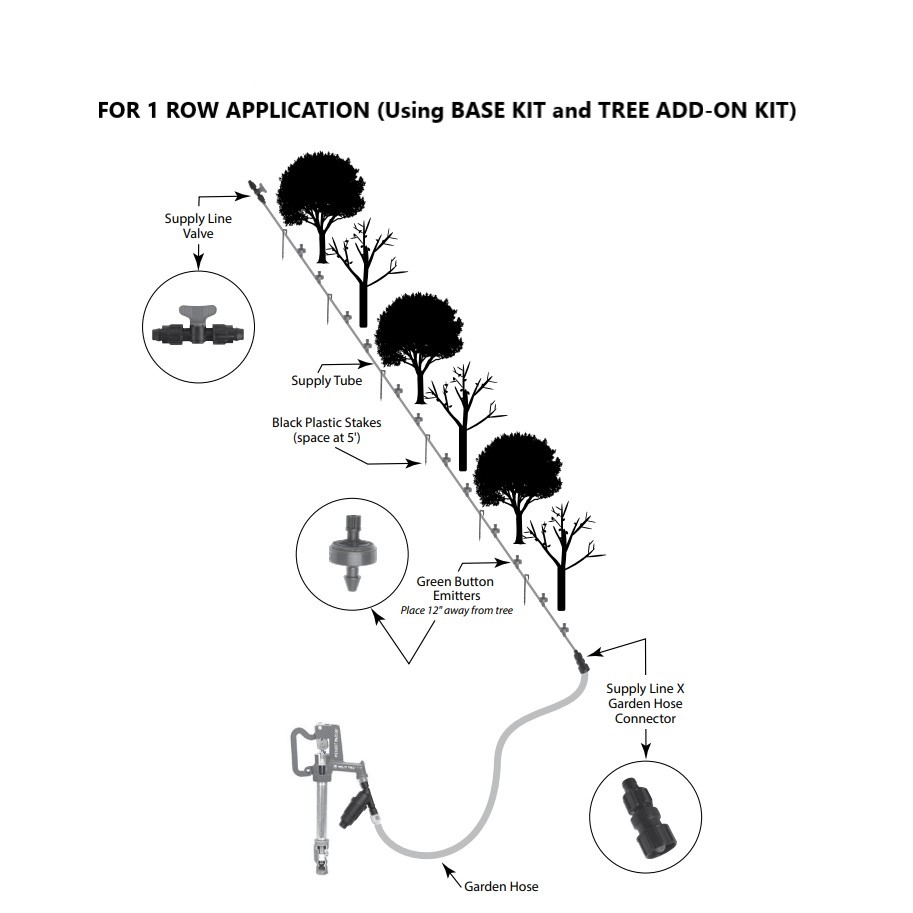
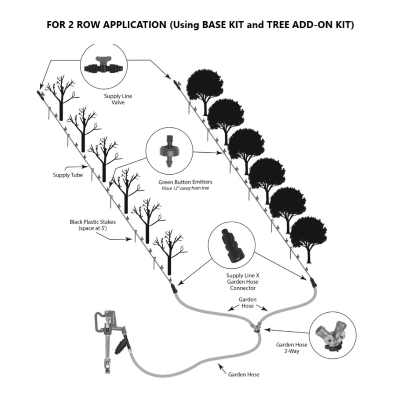
1. Using the Black Plastic Stakes, secure the tubing to the ground with blue stripe turned up. Space the stakes at approximately 5’ apart. Ensure no stakes are within 18” of any tree.
2. Take the Red Plastic Hole Punch and measure 12” away from either side of the tree on the blue line of your supply tube.
3. Apply pressure on either side of your Supply Tube with your thumb and fore finger.
4. Firmly press the tip of the Red Plastic Hole Punch onto the blue stripe and rotate the tool left and right until you see and feel the tip popping through only the one side of the tube.
5. Click in one Green Button Emitter using the green pointed side.
6. Repeat this process on either side of every tree.
7. Go to the end of your Supply Line that you intend to connect to your water source.
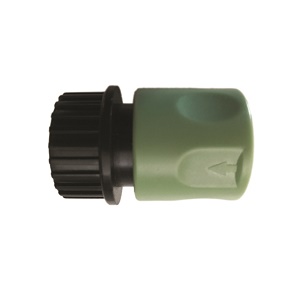
8. Pick one Supply Line X Garden Hose Connector.
9. Find the end with a barb and nut and turn the nut against the octagon shaped body.
10. Force the Supply Tubing over the exposed barb and into the neck of the nut.
11. When completely inserted, hold Supply Tubing firmly in place and thread nut over top of supply tube until tight. If you have two rows of trees, repeat this process on the second line.
12. Find the 2 Supply Tube Valves in your kit.
13. Thread any one of the nuts against the main body.
14. Ensure the valve is open.
15. Fasten Supply Tube Valve to the far end of Supply Tube (both, if you have 2 lines). If you are running a single supply tube, connect a garden hose between Base Irrigation Kit and Supply Line X Garden Hose Connector. If you are running 2 lines, connect 1 garden hose between Base Irrigation Kit and the included Garden Hose 2-Way. Now connect one garden hose between each Garden Hose 2-Way outlet and each Supply Line X Garden Hose Connector or connect Supply Line X Garden Hose Connector directly to the Garden Hose 2-Way.
16. Open the tap on your water source and let your system flush for 30 seconds.
17. Close all Supply Tube Valves and your system will pressurize and start irrigating
Only logged in customers who have purchased this product may leave a review.

Reviews
There are no reviews yet.